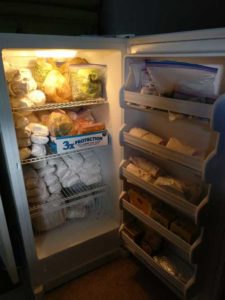
I originally started canning because I ran out of space in my deep freezer. Even now, I treasure precious freezer space, preferring to save it for grass fed beef, pastured poultry, soup bones, and vegetables I find at great prices at the farmers market.
Even now, I’m trying to eat my way through my last bulk beef order, so I can make room for a whole hog. You may have noticed that I don’t have any pork recipes on Revived Kitchen yet. That’s all about to change. Did someone say pastured bacon? :D
Just look at how packed my freezer is!

Space is precious, so instead I can food. Plus, there’s nothing like being able to go grab some delicious, nutrient-dense homemade beef broth out of my cabinet. It’s so easy and inexpensive to make!
**Also, if you’re not up for canning, check out my recipe for instant broth.
A few things you should know about canning:
There are two ways to can: via water bath or pressure canner. Water bath canning typically requires an acid either natural or added. This means you can can tomatoes and fruits in syrups or with added lemon juice.
Pressure canning allows you to can low-acid foods like broth, soups, meats, and veggies like green beans and corn.
Pressure canning times can vary based on altitude, so always refer to a canning guide.
* Be sure to remove as much fat as possible from the jars so it doesn’t interfere with the seals.
Supplies you’ll need
- A pressure canner (I love my All-American Canner!)
- Glass Jars (I used these.)
- Lids and seals (I use reuseable BPA-free lids, but you can also get one-time use lids here.)
- Jar lifter (buy here)
- Magnetic tool used for the metal one-time use lids (buy here)


I had never seen reusable lids. Thanks so very much for sharing. I’m going to check into some. You’re video was amazing, I’m canning turkey bone broth using a left over turkey carcass and celery, carrots and onion scraps I’ve been saving in the freezer.